
Is your child ready to enter the world of online business? Have you been thinking of helping your kid to build a website but don’t know where to start?
In this article, I will discuss the following:
- Seven reasons why your child should have their own website.
- Five reasons why I like Bluehost.
- Steps to help your kid build a website.
Seven Reasons Why Your Child Should Have Their Own Website
1. Establish Internet Presence
We live in the Age of the Internet. Websites are “online real estate” now. Don’t believe me? There are websites being sold online and some are sold for thousands of dollars.
But more importantly, by helping your child to create their own website, you are helping your child to establish their internet presence. Even if your child doesn’t end up doing very much with it, helping your child to purchase their own website is like staking their claim on their own piece of online real estate.
2. Learn Skills
I think that one of the most important parts about helping your kid to build a website is to enable them to pick up website building and content creation skills early (and maybe even programming!)
I remember when I first started learning about websites. I was so clueless and so lost. Some of my other friends could instinctively understand everything but for me…it was like a fish learning to walk on land. My old brain has been so used to letter-based languages that any type of programming language looked alien to me.
The sooner your child gets exposed to online programming, content creation and how things work online, the easier it will be for him or her to pick things up.
3. Physical Safety
Another big reason why I like the idea of kids having their own website is that it removes some of the physical safety threats that traditional ‘brick and mortar’ businesses bring.
For example, a physical lemonade stand exposes the location of your child and an adult needs to be close by all the time.
On the other hand, if your child ran their businesses from the internet and found a way to get everything done without having to physically face a customer, they can retain physical anonymity and even identification anonymity, if desired.
Having said this, the internet does present its own set of dangers including exposure to undesirable content, addiction to social media, online bullying, “trolls” and hacking. I really feel that it’s our duties as parents to understand these dangers ourselves and teach and prepare our kids to deal with them.
4. Reach
An online website enables your child to reach customers that a sole physical location couldn’t.
Even if your child currently has a successful location-based business, any serious upscale of the business will require your child to maintain an online presence.
Think about it, a business that doesn’t have a web presence is missing out on valuable customers. The need to maintain an online presence is so important that Google has provided a free listing service for any business that wants it.
5. Potential for Passive Business
Another thing that I really love about having a website is that it opens up possibilities of passive income. Passive income doesn’t mean that your child doesn’t have to put in hard work; it merely means that your child doesn’t have to sell time for money directly. It may also mean that your child could create a recurring stream of income if he or she automates most of the work. Think about YouTube influencers or online ebook sales for example.
6. Mobility
Having an online business allows your child to conduct business from anywhere. You could take a family vacation and as long as you can still find access to WiFi, your child can continue to run their business from wherever they are. They are not limited by location.
7. Low Startup Costs
One of the other fantastic reasons for helping your kid to build their own website is that unlike traditional ‘brick and mortar’ businesses, online businesses often have far, far less startup costs.
For example, I love Bluehost which provides hosting services for websites. Think of hosting like the leasing of an online location. While it is usual for businesses to pay thousands and thousands of dollars to lease a physical location (depending on where it is, its amenities and size), it only costs approximately $100 for an annual basic Bluehost hosting plan to approximately $300 for a Pro package.
Five Reasons Why I Like Bluehost
I am an absolute fan of Bluehost. In fact, I love their service so much that I applied to be an affiliate for them because I really believe that more people need to know about them!
Here are five reasons why I like Bluehost:
-
Hosting, Domain and Website Building All Rolled into One
Bluehost makes it easier for customers by combining the main things you need for a working website- domain name, hosting and website building platform, all done together at the same time. No need to work across several platforms, they are all linked together in Bluehost.
-
Work with WordPress or Weebly
Ok, if you don’t know anything about WordPress or website building in general, let me dish the juicy things that you really need to understand.
Number One. If your child intends to take the world of online business seriously, the whole world of website creation revolves around WordPress. And I mean, seriously, it’s WordPress all the way. In fact, WordPress has been declared to be the easiest and most powerful website building platform to use.
Consider this. Most developers use WordPress. Most plugins (kind of like apps for your smartphone) are created for WordPress. Help forums are mostly about WordPress. And if your child ever intends to sell the website or business, that’s right, most people only want to buy WordPress ones.
Number Two. However, if you are like me and know nothing about HTML and coding, you may find WordPress difficult to figure out. I consider myself more of a “social science oriented” person and WordPress just confounded me for many years. Many people will tell you that it is easy but if your brain works like mine, I felt like tearing my hair out a lot of the time.
Enter Weebly. Weebly and some other website creation services like Wix were created for technical dumbos like me. And I loved using Weebly. It was so much more intuitive and user-friendly for me. UNFORTUNATELY, once I realized point Number One above, I bit the bullet and converted my site from Weebly to WordPress and tried to force myself to work with WordPress. I eventually got the hang of it but I had to enlist the help of a theme provider service (Elegant Themes– more about it below).
The main summary is…if you or your child are just running the online business for fun (and have no intention of making money from it), hate WordPress or want to start off easy and don’t really care whether you eventually use WordPress or not, Weebly will be less painful.
But (and this is a BIG BUT), if your child wants to take things seriously and you intend to keep this business for the long term, don’t use Weebly, use WordPress.
-
Woocommerce
Now, let’s talk about Woocommerce. Woocommerce is in a category of its own. Unlike WordPress and Weebly, Woocommerce is an ecommerce platform. That means that it was designed to enable you to sell stuff online, just like a shopping cart. It is open source, which means that it is free to use and web developers love that as they can build on top of Woocommerce’s existing features.
Bluehost has partnered with Woocommerce so that you can integrate Woocommerce into your Bluehost’s existing suite of features.
-
24/7 Support
This is the MAIN REASON why I really like Bluehost. When you are not a tech-oriented person, it can get really expensive to hire a web developer to help you with little technical difficulties that inevitably come up from time to time. While Bluehost’s support is mainly to do with the hosting side of things, I found that the 24/7 available support was a website-saver. It stopped me from giving up completely and crawling underneath a blanket to cry every time I hit a snag with my website.
However, Bluehost’s support does not cover some problems within WordPress itself (which is more content management, not hosting). To cover for this gap, I made a one-off purchase for a theme from Elegant Themes, which also provides unlimited general support for many WordPress-related issues (though they use a ticketing system which takes a bit longer). With Bluehost’s and Elegant Themes combined support, I have so far never had to pay any other third party for technical support for my website (fingers crossed!)
-
Really Reasonable Rates
Last but not least, Bluehost’s rates are really reasonable.
Even better, Bluehost often has special discounts such as their $3.45 per month for 36 months deal.
Steps To Help Your Kid Build A Website
Now, let’s talk about building the actual website itself. If you are ready to help your child build their own website using Bluehost, let’s start! I will run you through it now step by step.
1. First, Go to the Bluehost Website
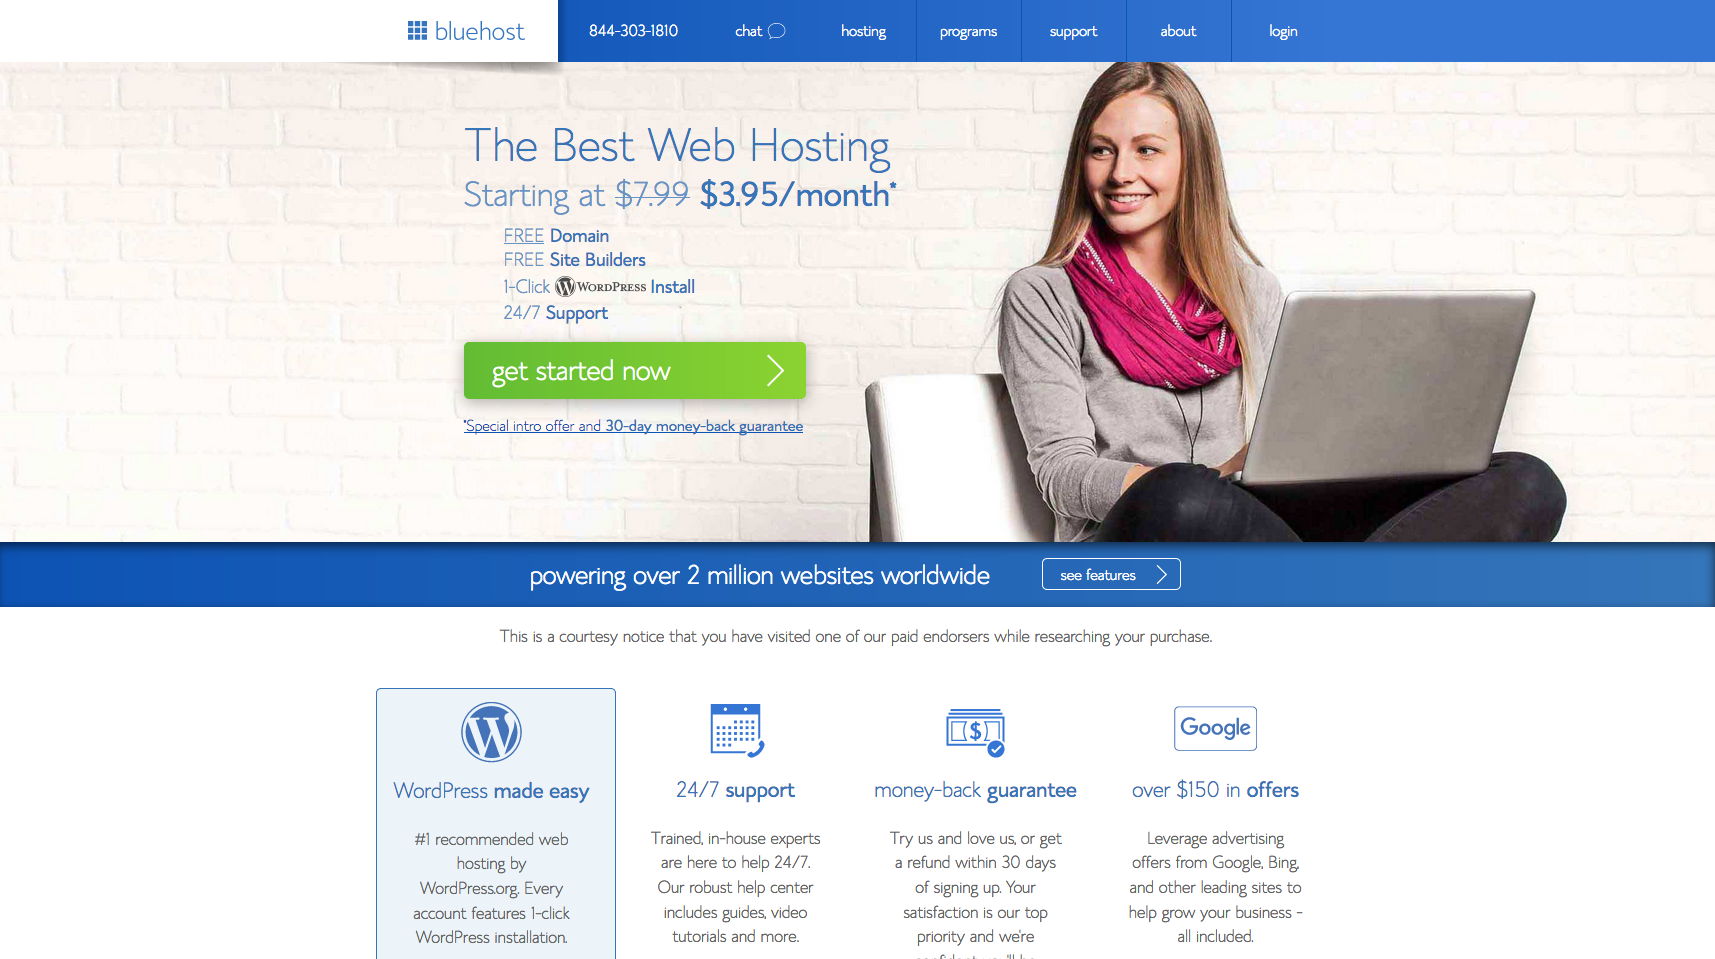
Don’t get conned by other copycats that are not actually Bluehost. Click here to get to the actual Bluehost website.
-
Select a Plan

How serious is your child about their business? If they are just testing the waters, you could select the basic plan. It’s very affordable.
If your child is already running a highly successful location-based business and is ready to take it further (or you have the money to spend), then consider the premium plan. The premium plan offers spam protection, domain privacy as well as site backup (backup of your child’s website content). If you don’t know what you are doing, this is probably the best way because everything is done for you.
If you are wondering whether you should buy a longer term website plan or a shorter term website plan, what you need to know is that Google takes the duration of your website plan into account when deciding how to rank your website. A longer duration indicates that you intend to stick around which is why a shorter term website plan tends to be rated lower than a longer term website plan.
3. Select a Domain Name
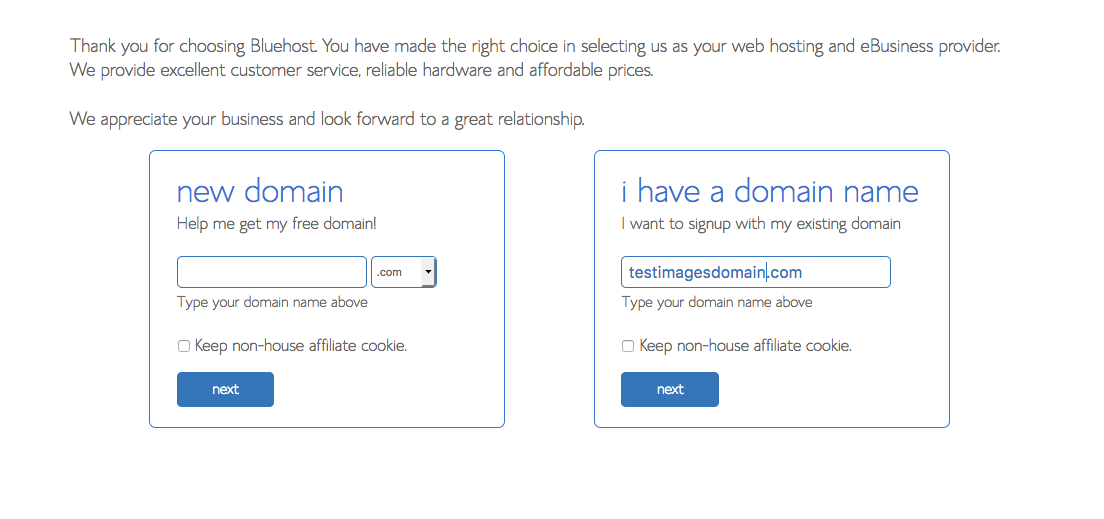
A domain name is the online address of your child’s website. For example, www.google.com is a domain name. YouTube’s domain name is www.youtube.com.
You normally have to pay for a domain name but a free domain name is included in your Bluehost package (yay!).
When it comes to choosing a domain name, there are many ways to go about it. Some want a domain name that is short and punchy. Some want one that gives a good description of what the website is about such as www.pets.com (although this is definitely no longer available).
If your child already has an existing domain name, just enter it into the box on the right.
-
Create Account
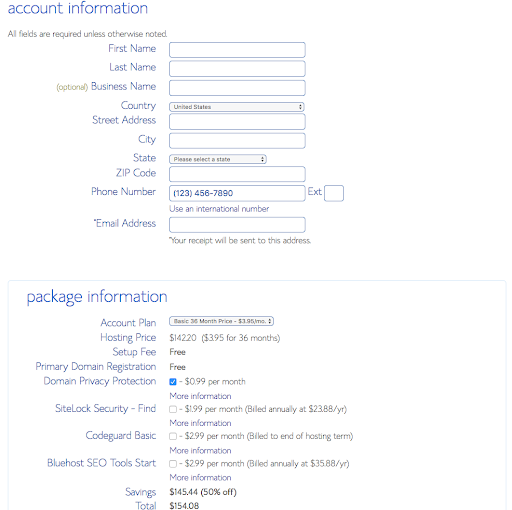
Next, you have to provide Bluehost with some details to create an account. Unless your child is old enough to look after the entire website on their own, I would suggest that you use your details. Be aware that if you don’t pay extra for domain privacy, your email address and name is discoverable by others online- another reason to use your details and not your child’s.
-
Provide Payment Information
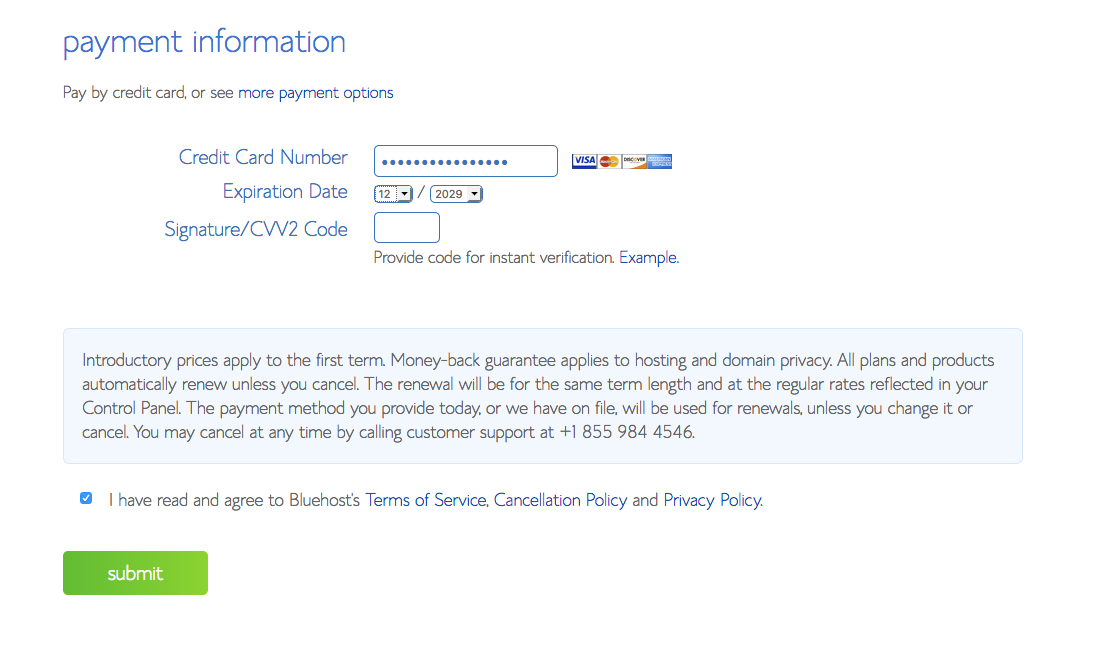
Here is where you fill in your payment information. The credit card option is what you will see first but there are also other options available. Just click on the link for more payment options on the first line.
-
Choose a Password

You will then be transferred to a new page to create a password for your child’s website. You may want to choose a password that your child can remember. However, you may also want to consider the importance of hacking prevention by choosing a password that is cryptic and random.
-
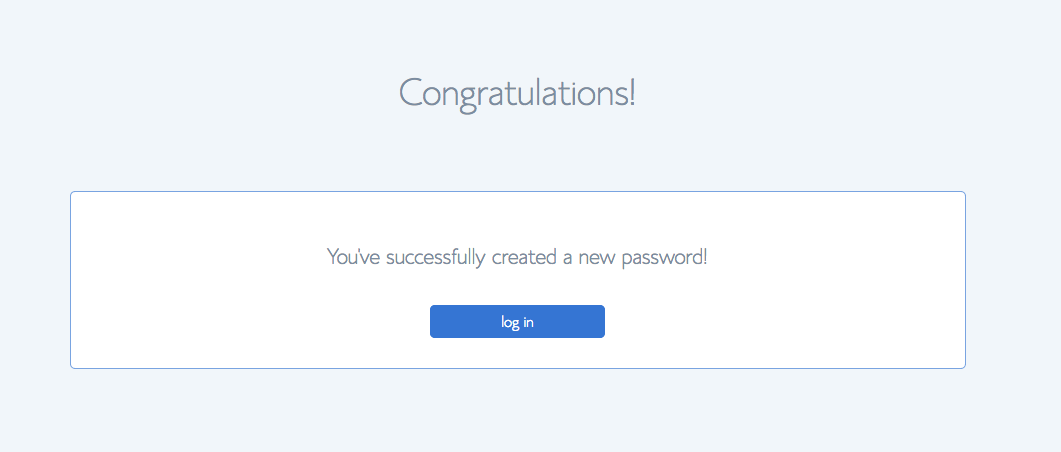
Confirm and Record Your Password

You will be asked to confirm your password. Make sure you record it down! Not only is this so that you can share the password with your child (assuming that you allow your child to have access to it) but it’s to avoid the problem of forgetfulness! This happens all too often (and yes, has happened to me!)
- Log In
You will be automatically taken to a website that allows you to log in to the website and you will need to use the password that you just created to log in.
- Pick a Theme
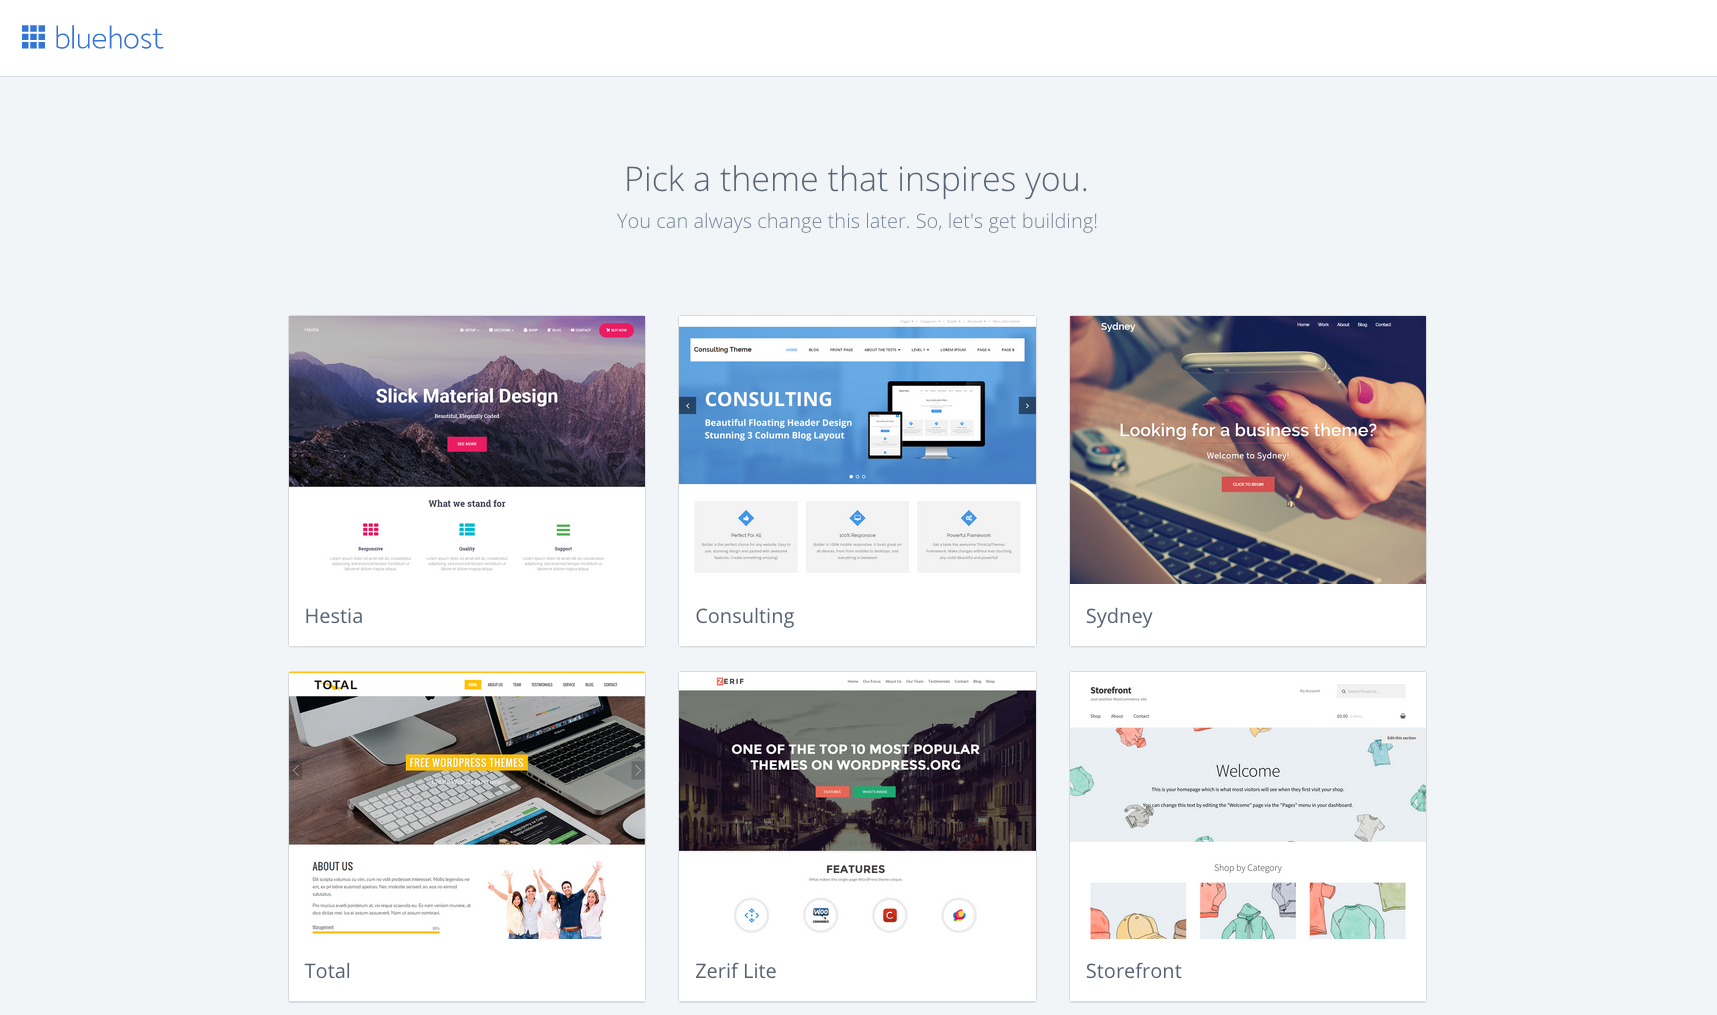
The next step is to choose a theme for your website. A theme is kind of like a design or pattern for your website. You can certainly involve your child in this part of the process (if he or she has not gotten involved yet) in choosing a theme for your website. This is where Elegant Themes came in for me- please see above for the details!
Once you have picked a theme, you will receive a notification that it’s time for you to start building your website.

- Build your WordPress Website
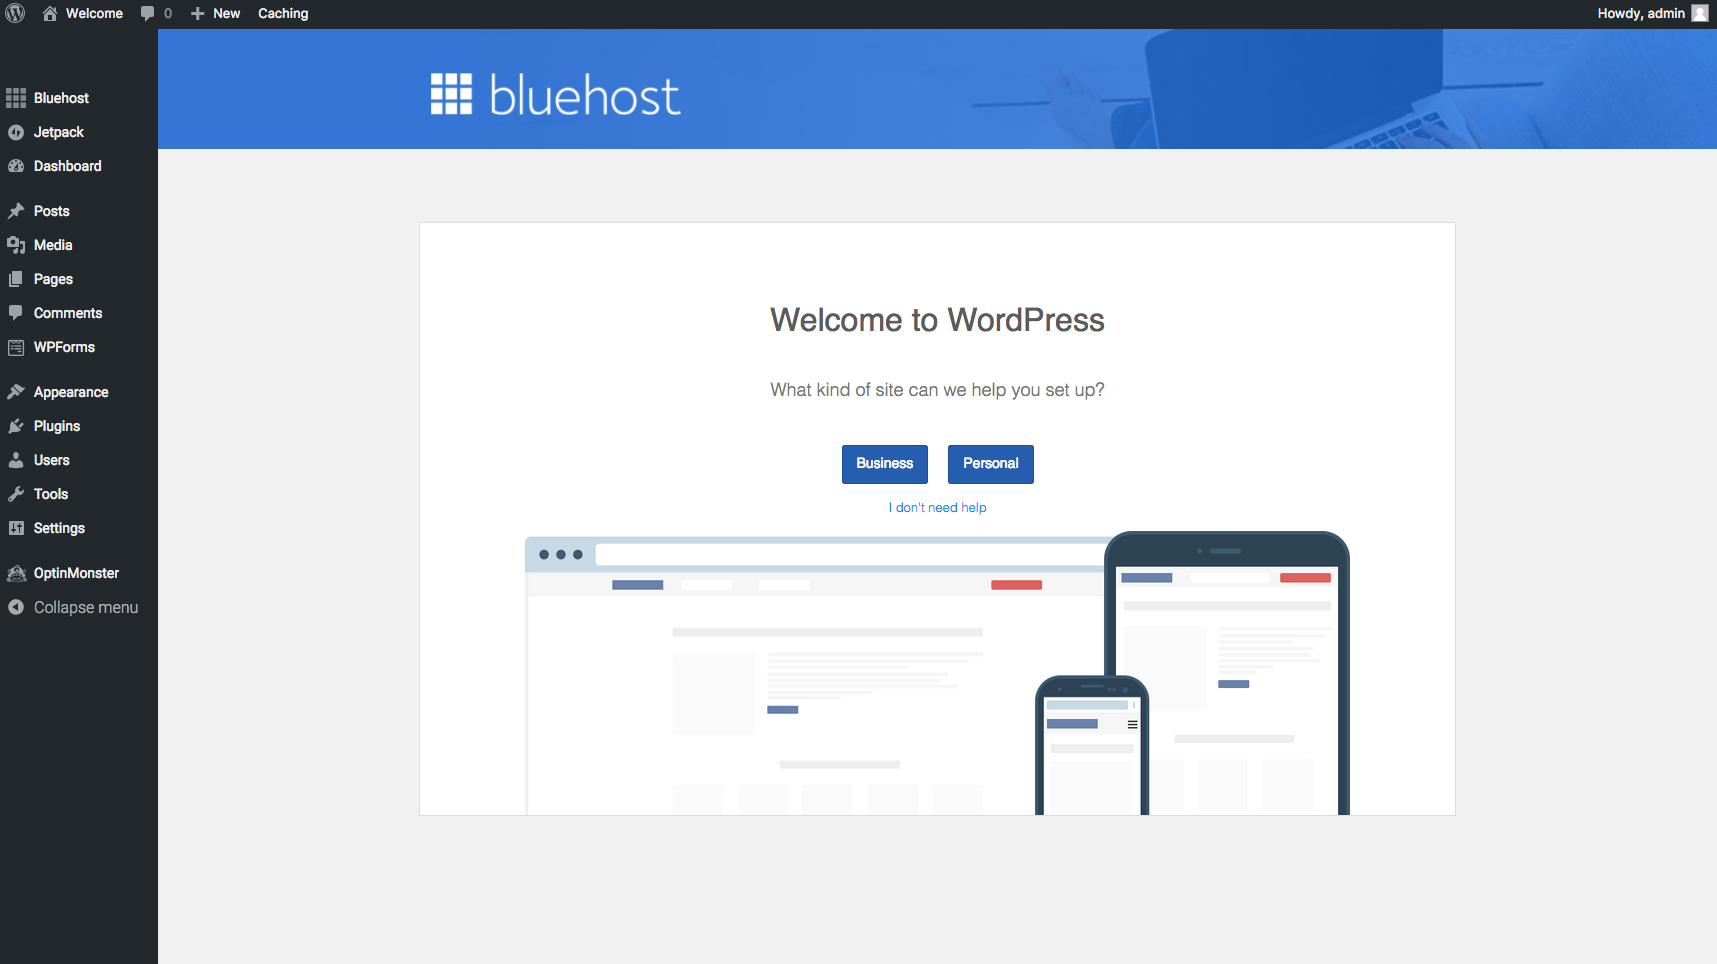
The next screen will have prompts to help you through the initial part of the website creation process. You just need to decide if you are planning to use the website as a personal or business website.
- Start Creating Content
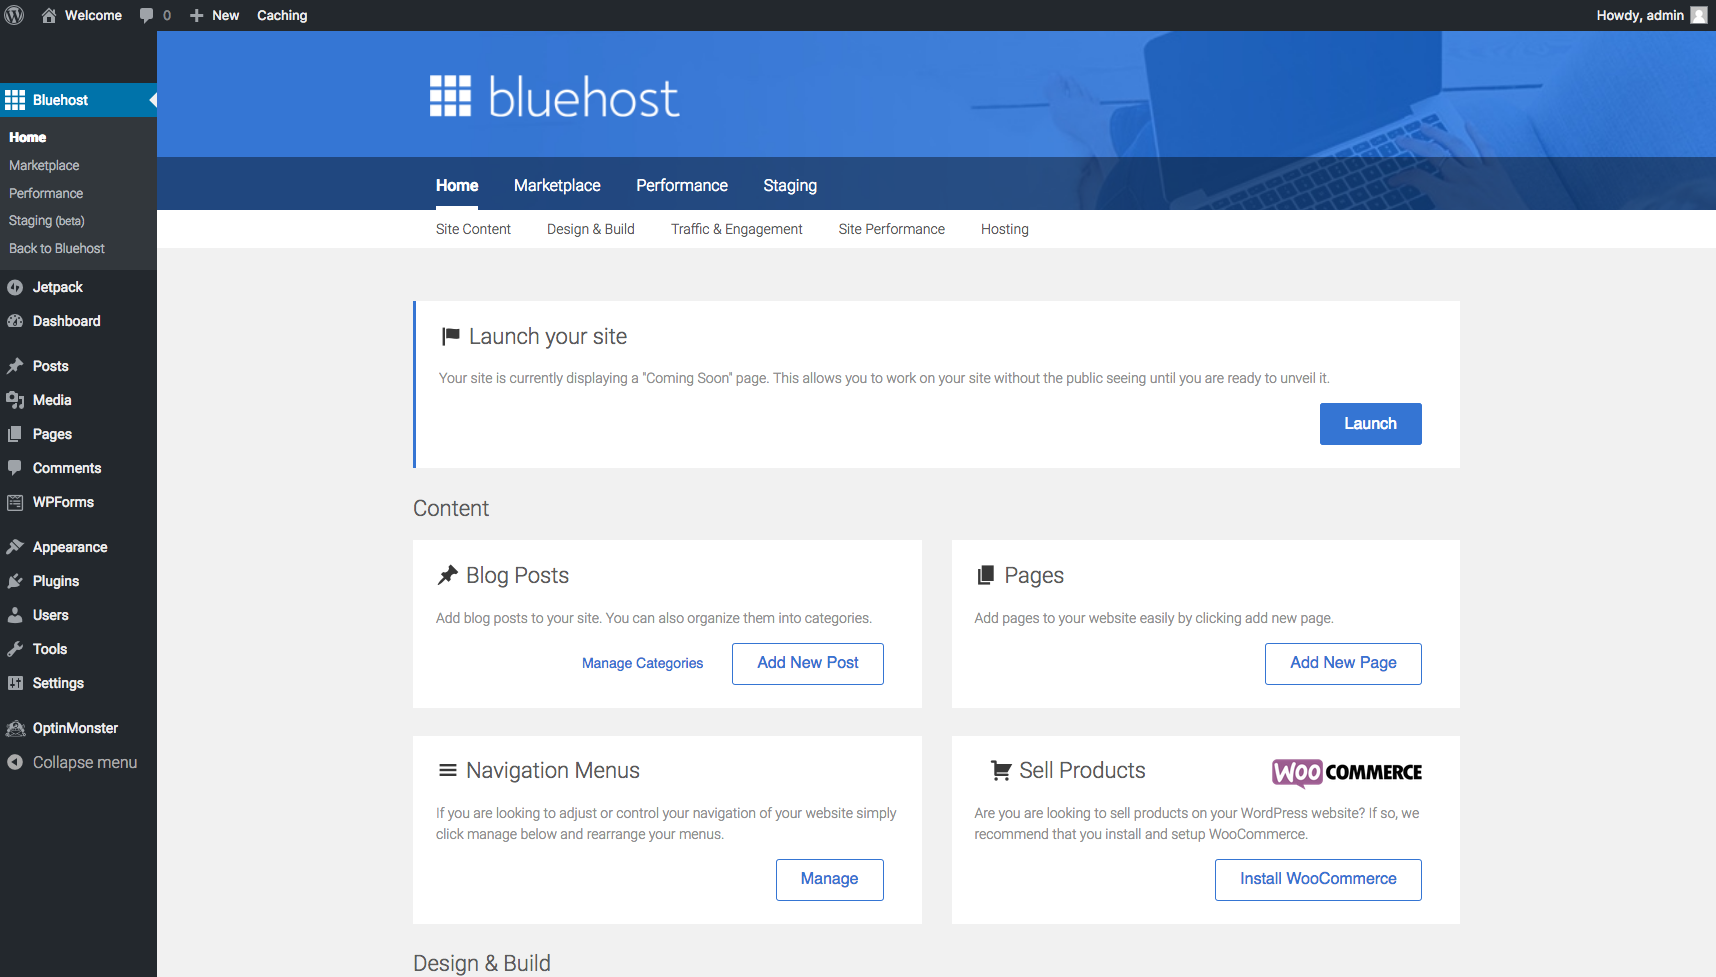
Now the fun truly begins! You will be given the option to start creating content while Bluehost places a “Coming Soon” notification for anyone who stumbles upon your website. This allows your child to tweak and work on the website until you get it to a point that you are ready to share it with the world. Once you are ready, you simply click on the “Launch” button and you will be given more prompts to help with the launch of the website.
- Launch Website
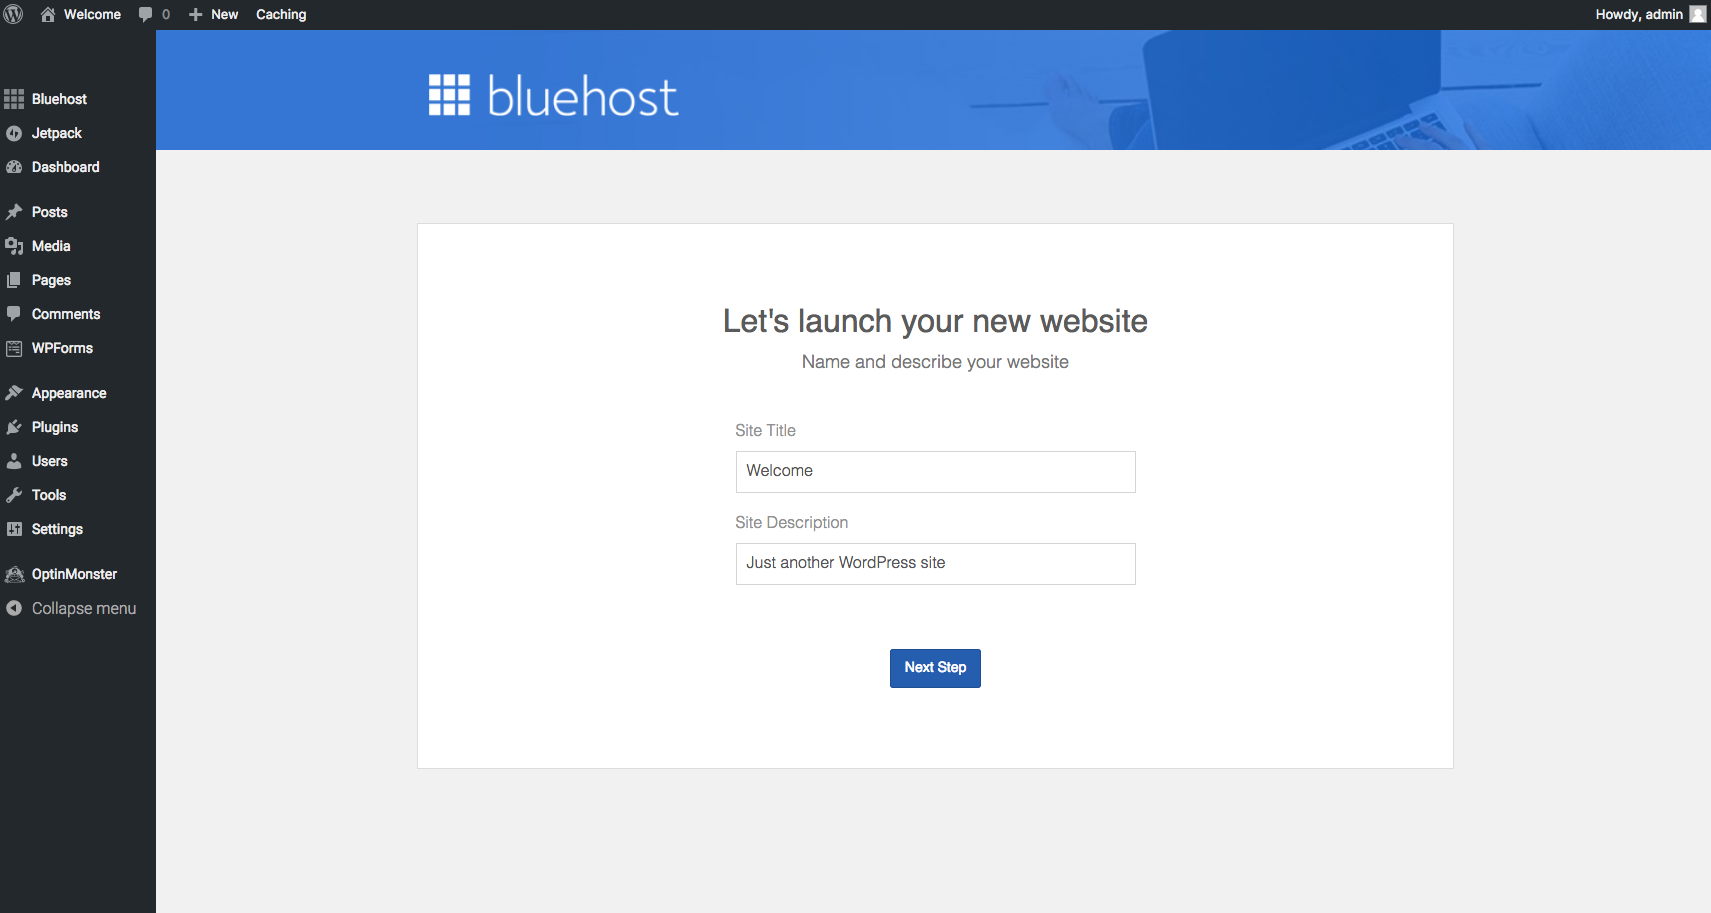
One of the details that Bluehost will request for in order to launch your website is your Site Title and Site Description. This Site Title and Site Description will show up in Google searches whenever anyone searches for your website.
Although I think that it is too overwhelming to try and learn everything all at the same time while you are launching your website, it’s a good idea to eventually dedicate time to learn about Search Engine Optimization and keywords. Don’t worry, your child can always come back to change the Site Title and Site Description later on in WordPress.
- Keep Improving!
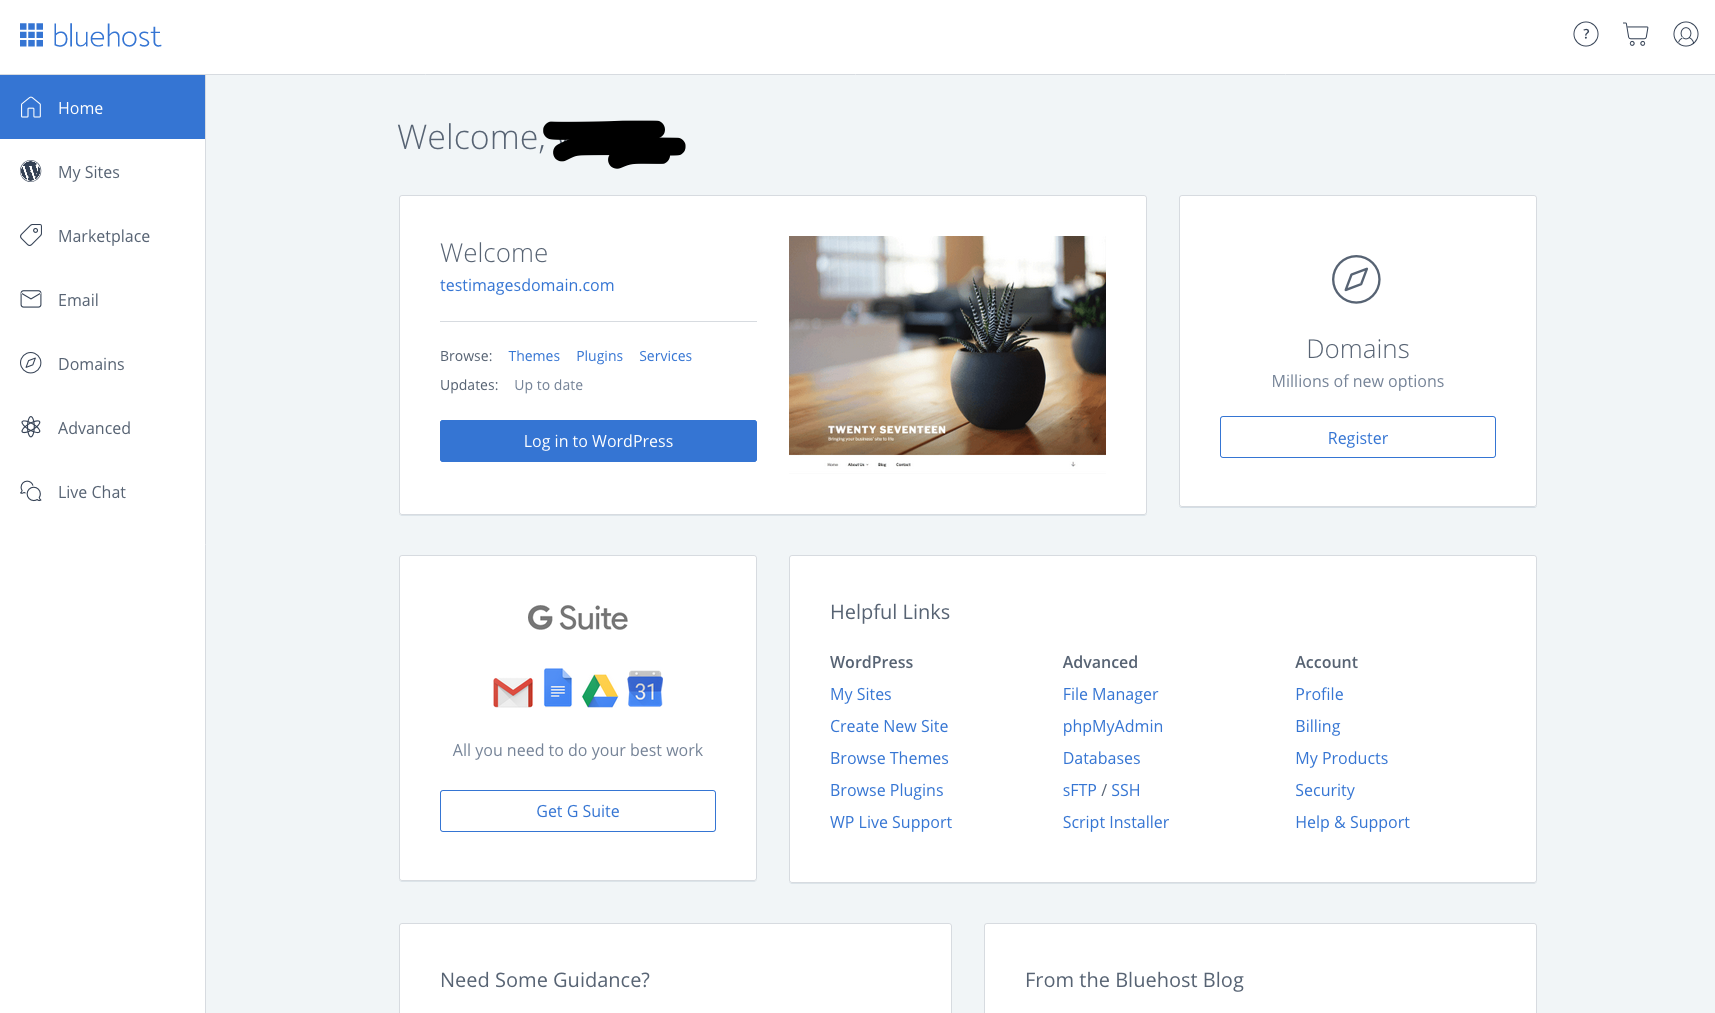
Finally, you will be taken to a page that lists your Bluehost tools including a login to WordPress. You can login to WordPress from here or just login directly to WordPress to access your website. From this point onwards, you can continue to work on improving and building the website or creating more content for it.
Congratulations! You have helped your child to create their own website.
You may have learned a thing or two but more importantly, if you involved your child in the creation process, your child would have learned something. Website building is an ongoing process. It takes lots of work to make a website truly amazing but your child will be so proud when they see the final result- trust me! Take things one step at a time and eventually, your child (and you) will have a website that you will both be super proud of.


